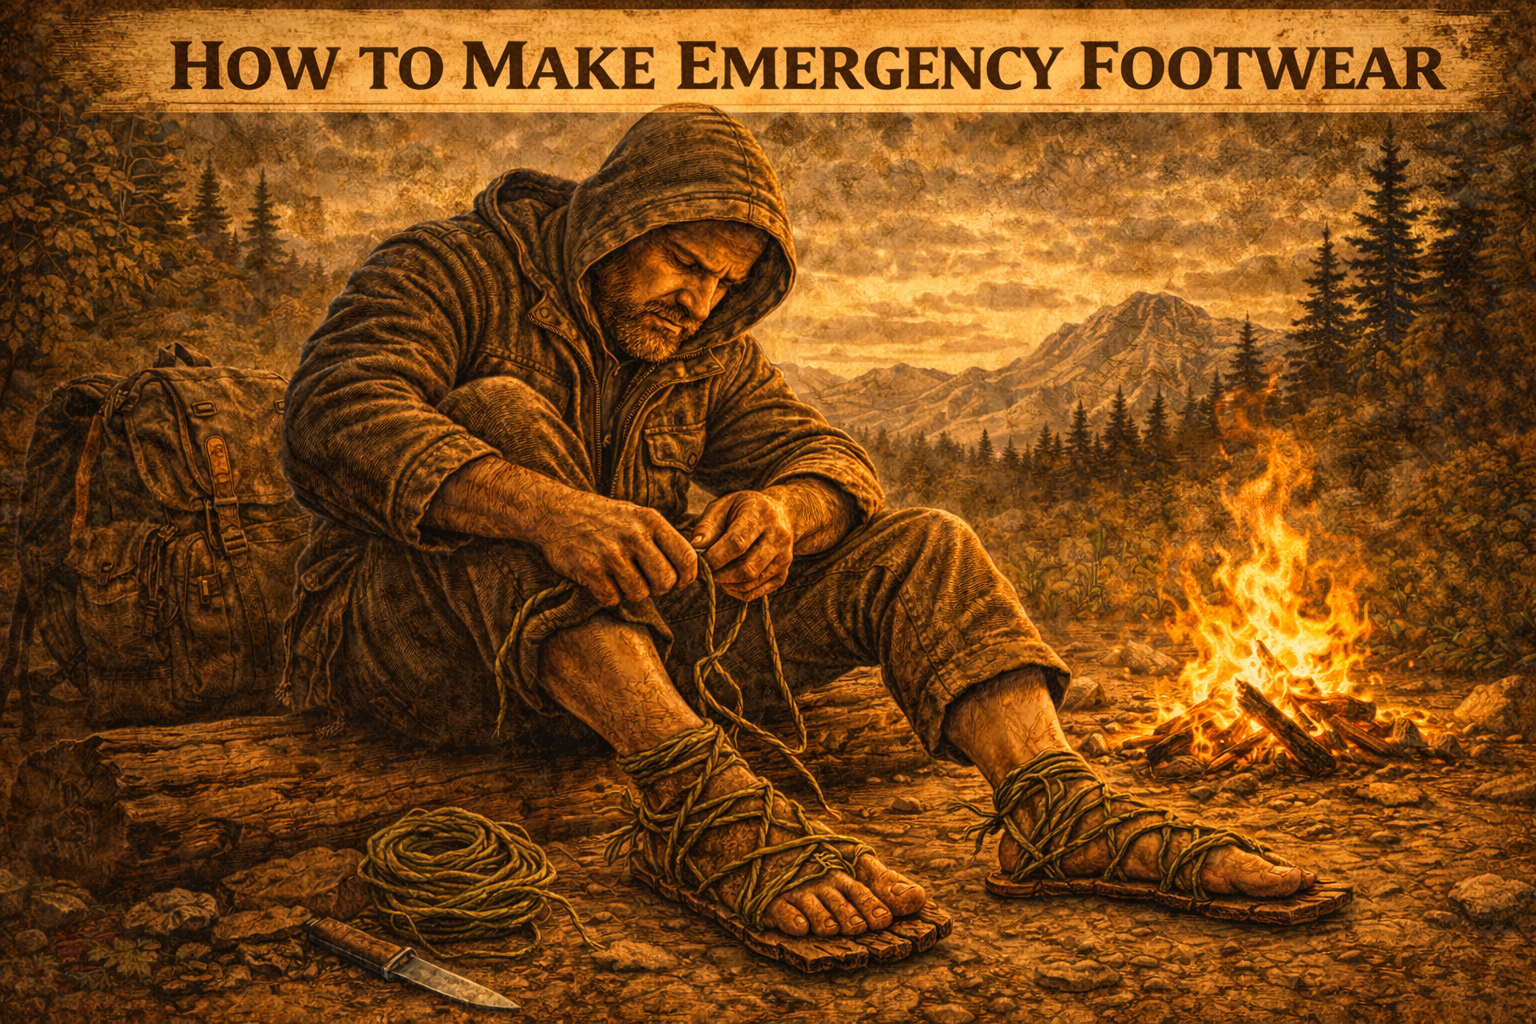
How to Make Emergency shoes: Skill 76
Feet decide distance.
Distance decides survival.
Boots tear. Soles split. Ground cuts.
Bare skin loses.
Emergency footwear isn’t about comfort.
It’s about protection, insulation, and traction.
WHAT IT DOES
• Shields skin from cuts and burns
• Reduces heat loss through ground contact
• Improves grip on unstable terrain
• Extends travel range
• Prevents infection from minor wounds
If your feet fail — you stop.
CORE RULE
Barrier beats nothing.
Structure beats softness.
Even crude protection is better than exposed skin.
Every improvised shoe answers one question:
• Do I need insulation?
• Do I need puncture resistance?
• Do I need traction?
Answer that — then build.
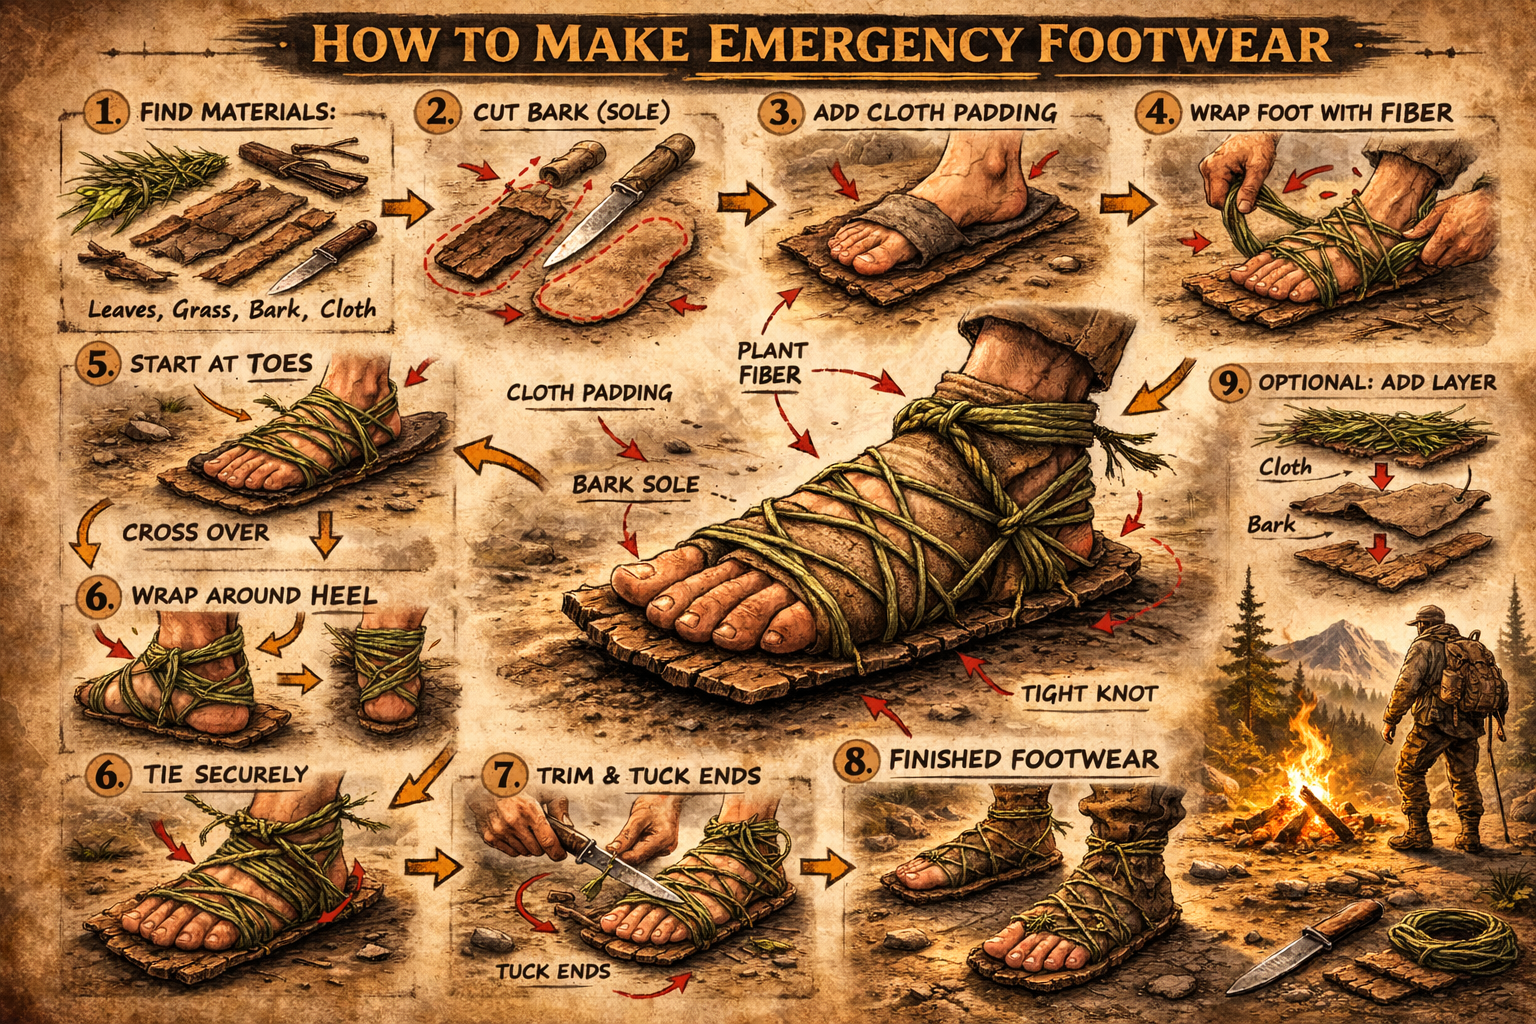
FIELD METHOD (IMPROVISED FOOTWEAR)
1. Create a sole first
The ground does the damage.
Use:
Thick bark
Folded cardboard
Car floor mats
Backpack frame sheets
Multiple layers of fabric
Sole first. Always.
2. Add padding
Blisters stop movement fast.
Dry grass.
Clothing scraps.
Moss.
Foam.
Keep it dry if possible.
3. Secure tightly
Loose footwear wastes energy.
Wrap with:
Paracord
Cloth strips
Belts
Duct tape
Anchor at heel and midfoot.
4. Protect the toes
Rocks find exposed skin.
Add an extra wrap or fold over the front.
5. Test before distance
Walk 20 steps.
Adjust.
Re-tighten.
Then move.
TIPS
• Wet insulation steals heat
• More layers = more durability
• Avoid direct cord on bare skin
• Retie often — movement loosens everything
• If you can hear it flapping, it’s failing
BOTTOM LINE
Footwear is mobility.
Mobility is options.
Options are survival.
Cover the skin.
Secure the sole.
Keep moving.
Frequently Asked Questions:
-
Flexible materials like cloth, bark, foam, or layered plastic help protect feet while walking.
-
Foot injuries reduce mobility and can quickly become dangerous in remote conditions.
-
Yes, but waterproof outer layers improve durability and comfort.
-
Avoid loose bindings because they cause slipping and blisters.
-
That depends on terrain, but reinforced soles usually last longer.
step by step on how to make footwear
Related skills: